Leavo’s onboarding helps you set up a fully working workspace in just a few minutes.
In one guided flow, you’ll configure the essentials Leavo needs to calculate leave correctly: your company settings, your default holiday allowance rules, and your standard working schedule.
You’ll go through 3 setup steps:
- Company & Members — Add your company details and invite your first employees
- Holidays Allowance — Define your default annual allowance and enable leave types
- Employees Standard Schedule — Set your default working days and hours
Once completed, your workspace is ready for requests, approvals, leave tracking, and calendar visibility.
Sign Up
Create your Leavo account to start managing your team’s leaves and schedules.
Access URL
Go to: https://app.leavo.com/signin
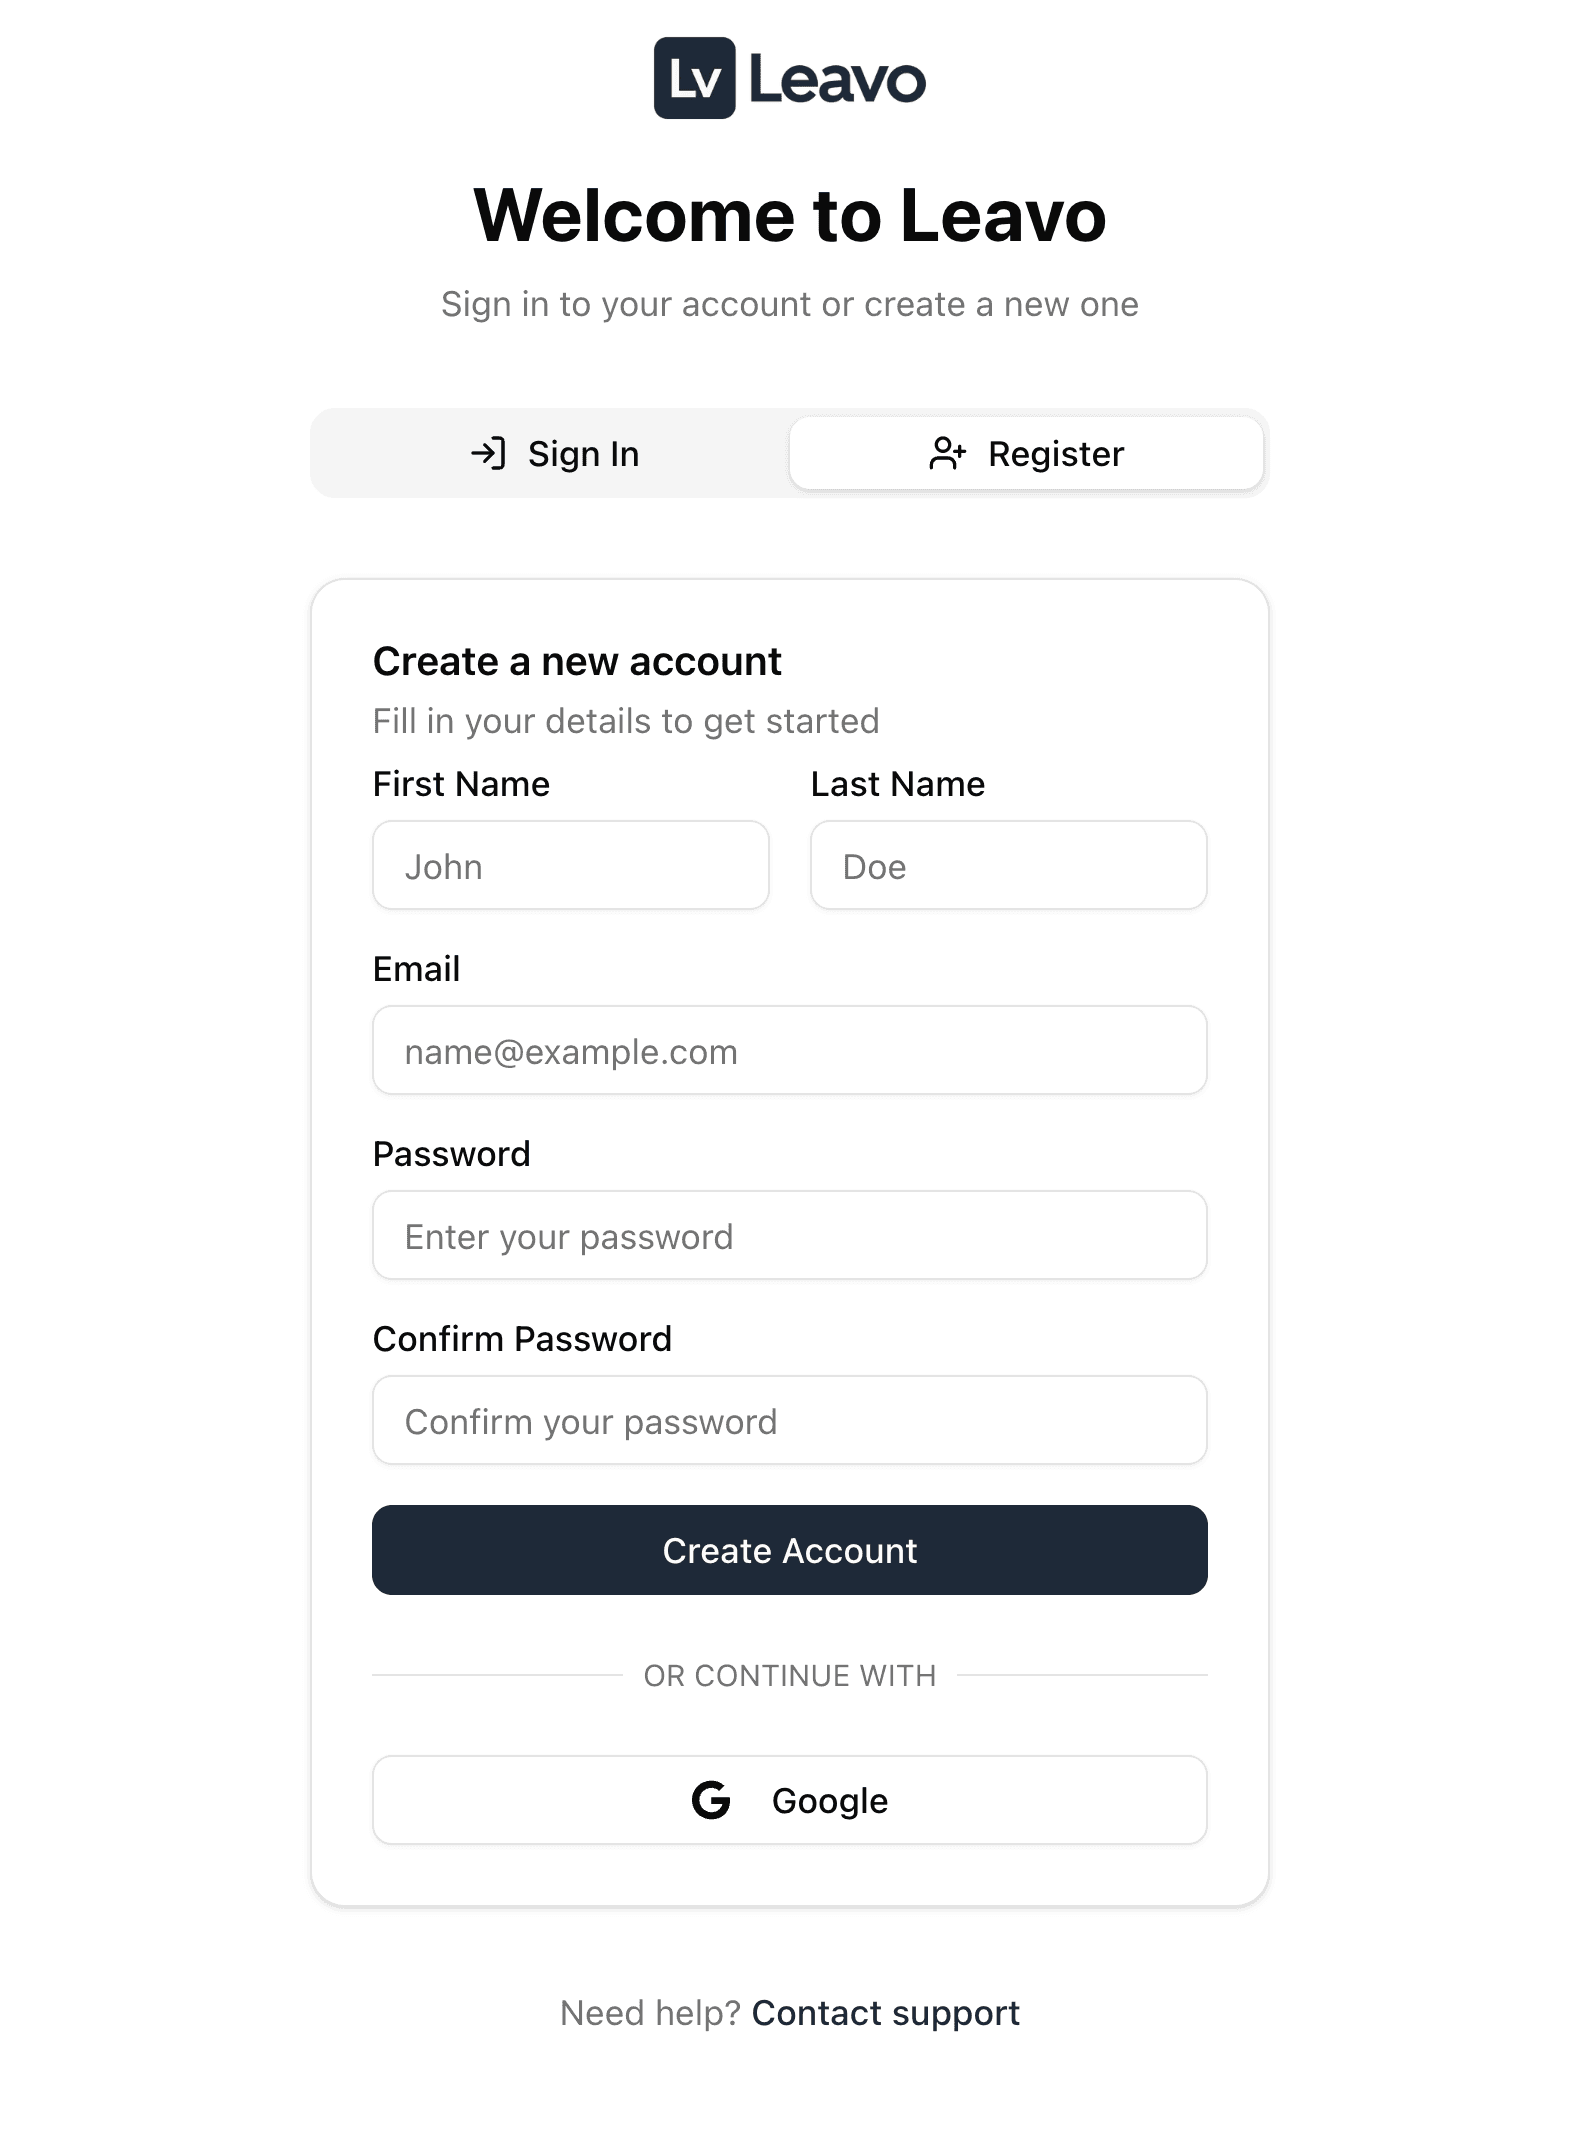
How to Sign Up
- On the registration page, fill in your details:
- First Name — Your given name.
- Last Name — Your family name.
- Email — Your work email (used for login and notifications).
- Password — Create a secure password.
- Confirm Password — Re-enter your password to confirm.
- Click Create Account.
- Optionally, choose Continue with Google for instant sign-up without a password.
- Check your inbox and click the verification link to activate your account.
You can switch between Sign In and Register at any time at the top of the form.
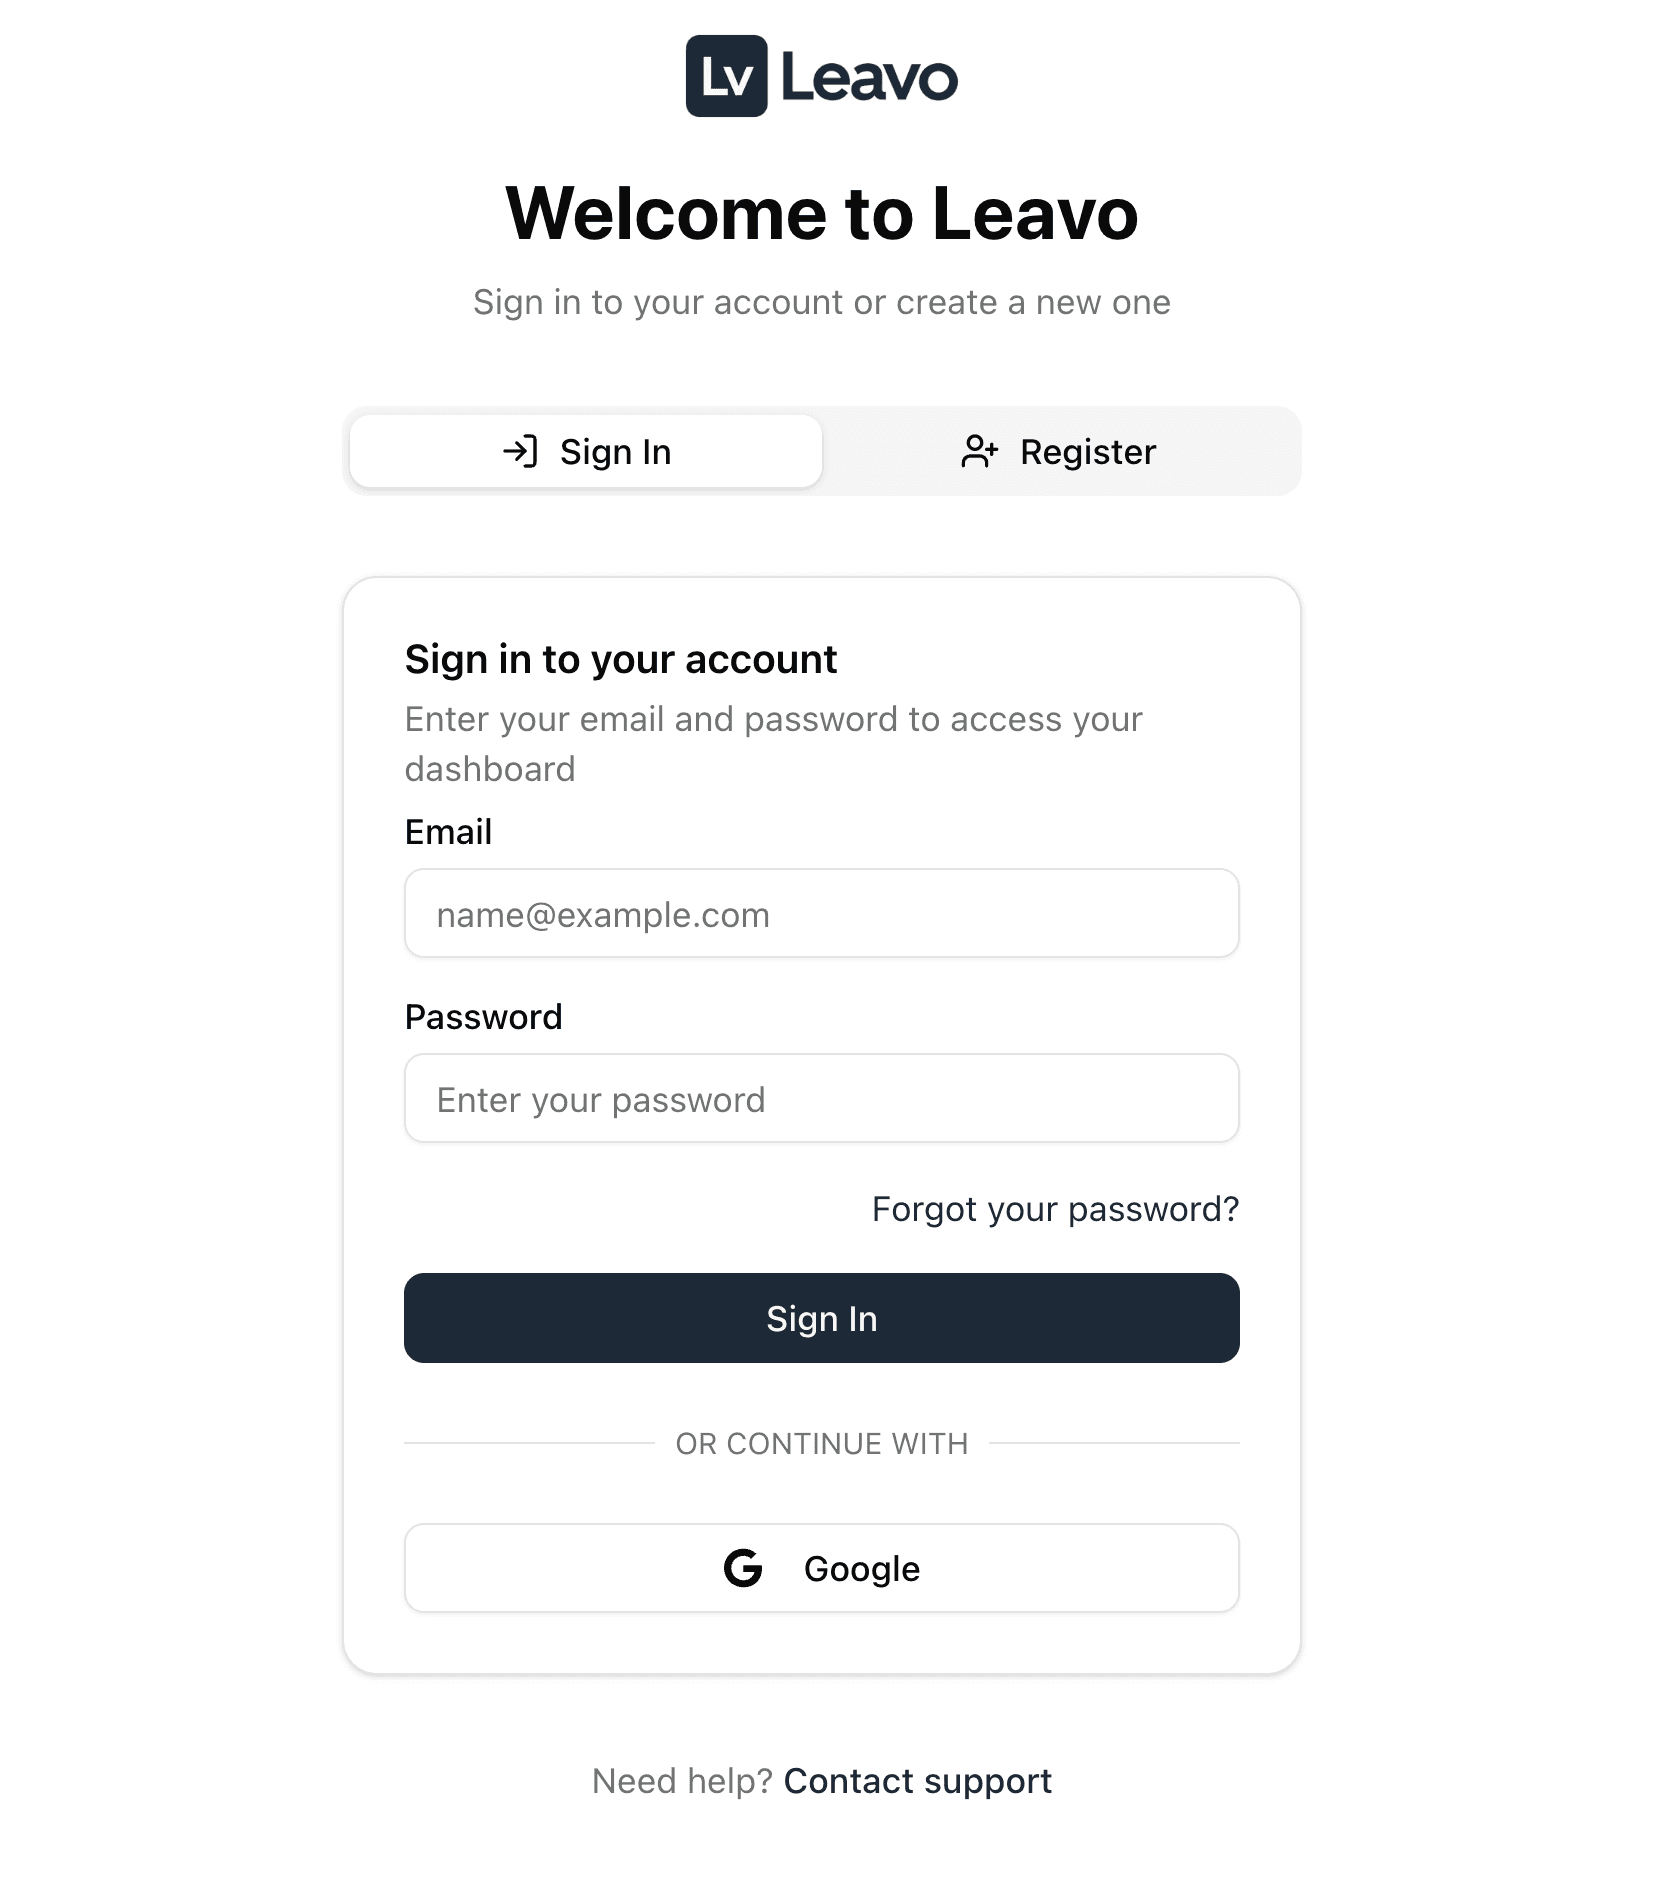
Sign In
Access your Leavo workspace anytime with a secure, password-free experience.
Access URL
Go to: https://app.leavo.com/signin
Sign-In Steps
- Enter your email and password.
- Click Sign In, or choose Continue with Google for instant access.
- If you’ve forgotten your password, click Forgot your password? to receive a reset link.
For the fastest experience, use Google Sign-In no password resets, instant login.
Complete Your Setup
After signing in for the first time, Leavo will guide you through a short setup wizard to configure your company workspace.
This includes Company & Members, Holidays Allowance, and Employees Standard Schedule.
1️⃣ Step 1: Company & Members
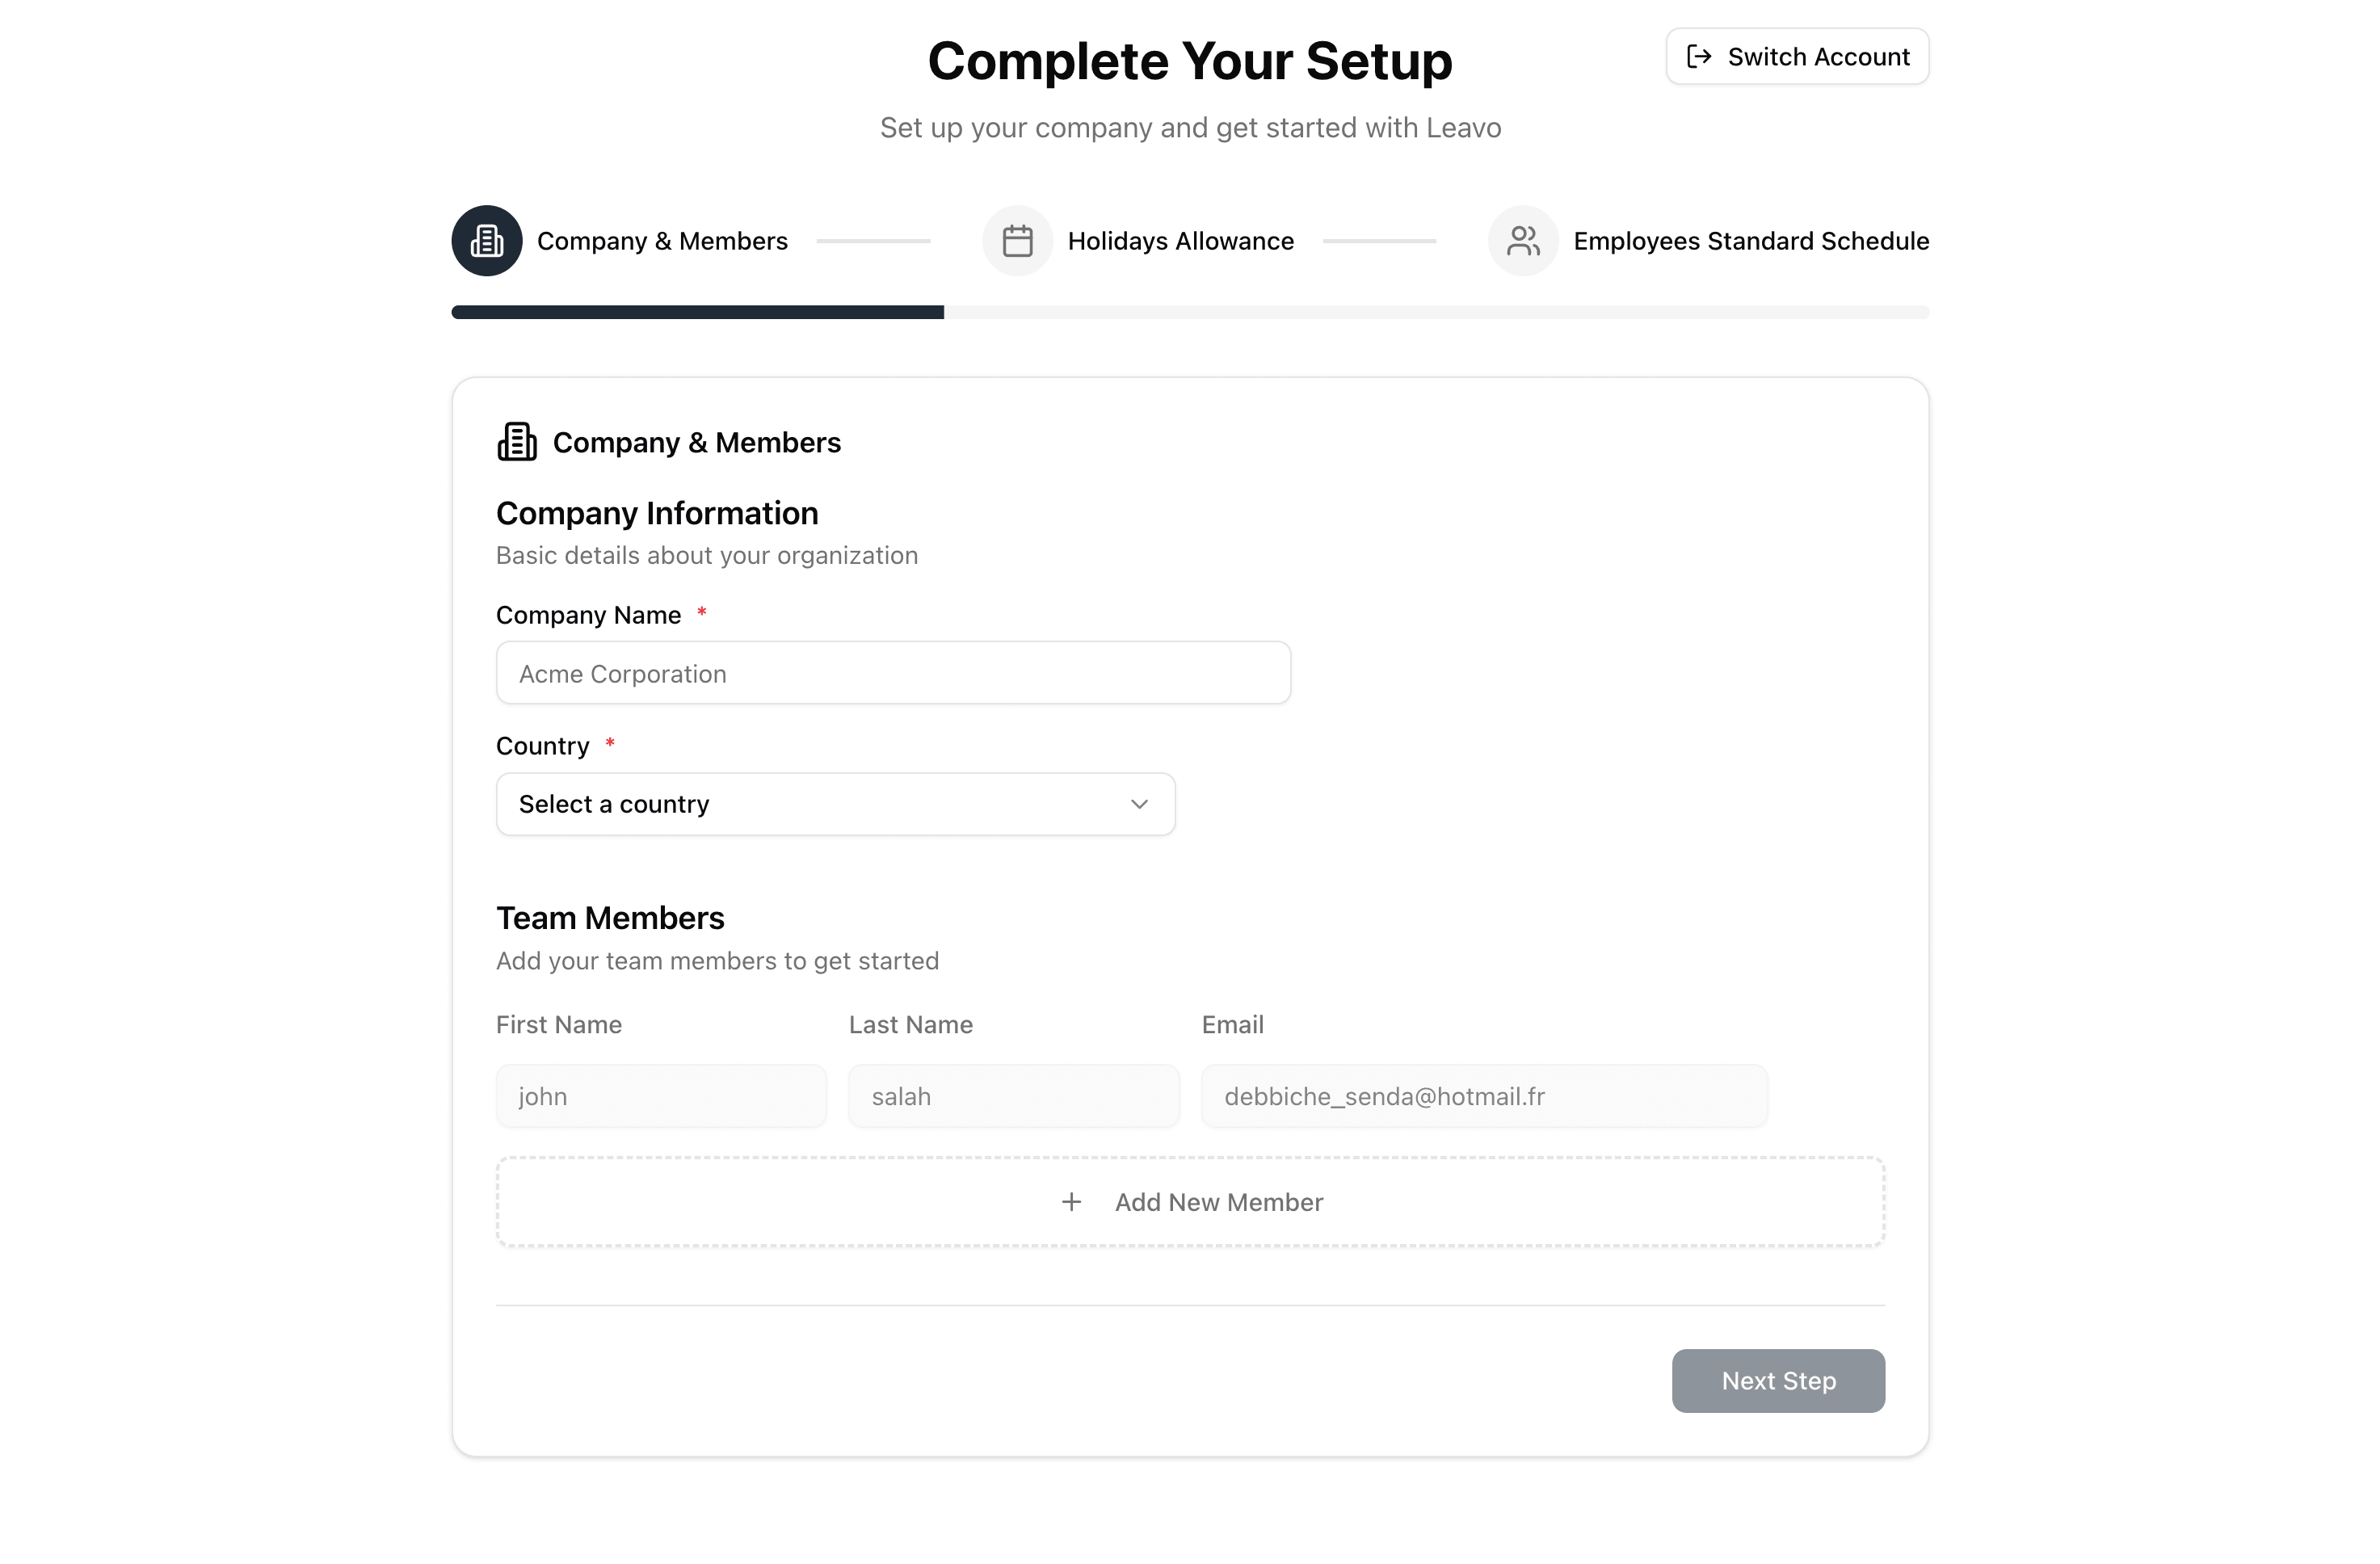
Fill in your company’s details and invite your first team members.
| Field | Description |
|---|---|
| Company Name | The name of your organization. |
| Country | Used for setting regional holidays and time zones. |
| Calendar Configuration | Choose your fiscal or calendar year start (January 1st, April 1st, or a custom date). |
| Team Members | Add at least one team member to get started. Include first name, last name, and email address. |
You can add more team members later from Administration → Members.
2️⃣ Step 2: Holidays Allowance
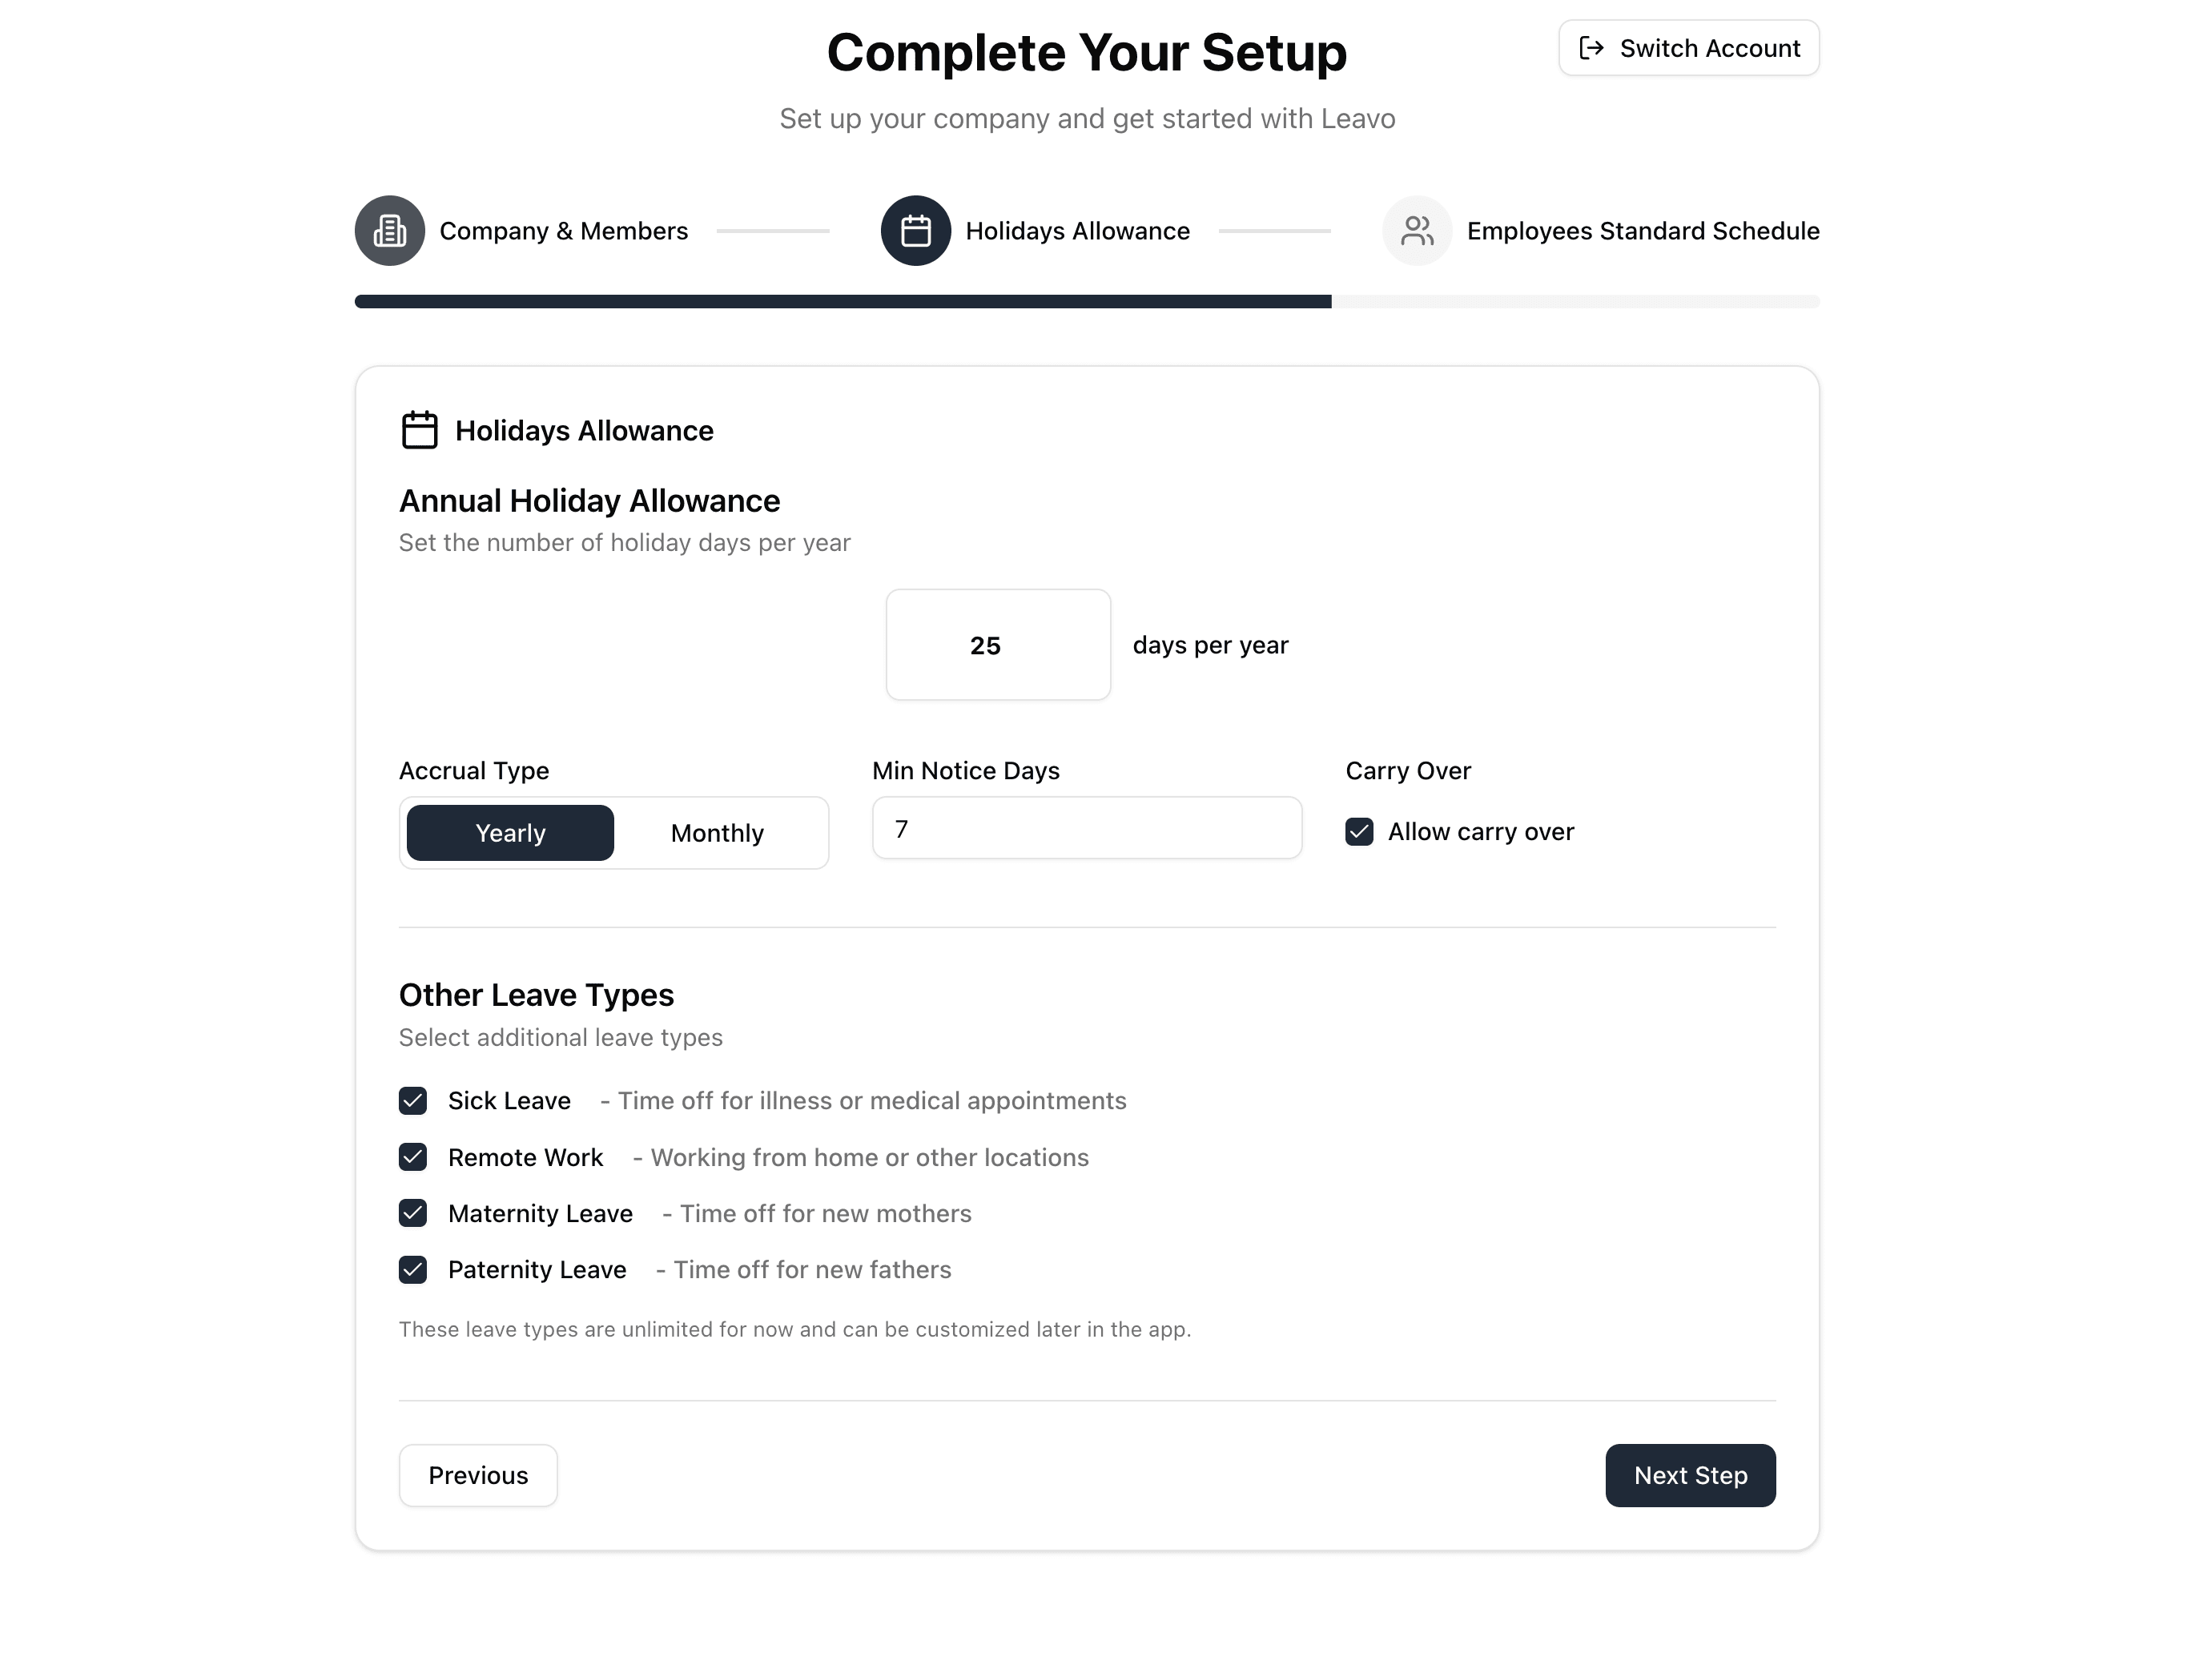
Set your company-wide annual allowance and configure leave types.
| Field | Description |
|---|---|
| Annual Holiday Allowance | Default number of paid leave days per year (25). |
| Accrual Type | Choose Yearly or Monthly accrual. |
| Min Notice Days | Minimum days required before requesting leave. |
| Carry Over | Allow unused days to roll over to the next year. |
| Other Leave Types | Enable optional leave types (Sick Leave, Remote Work, Maternity, Paternity). |
These settings apply globally and can be customized later under Leave Policies.
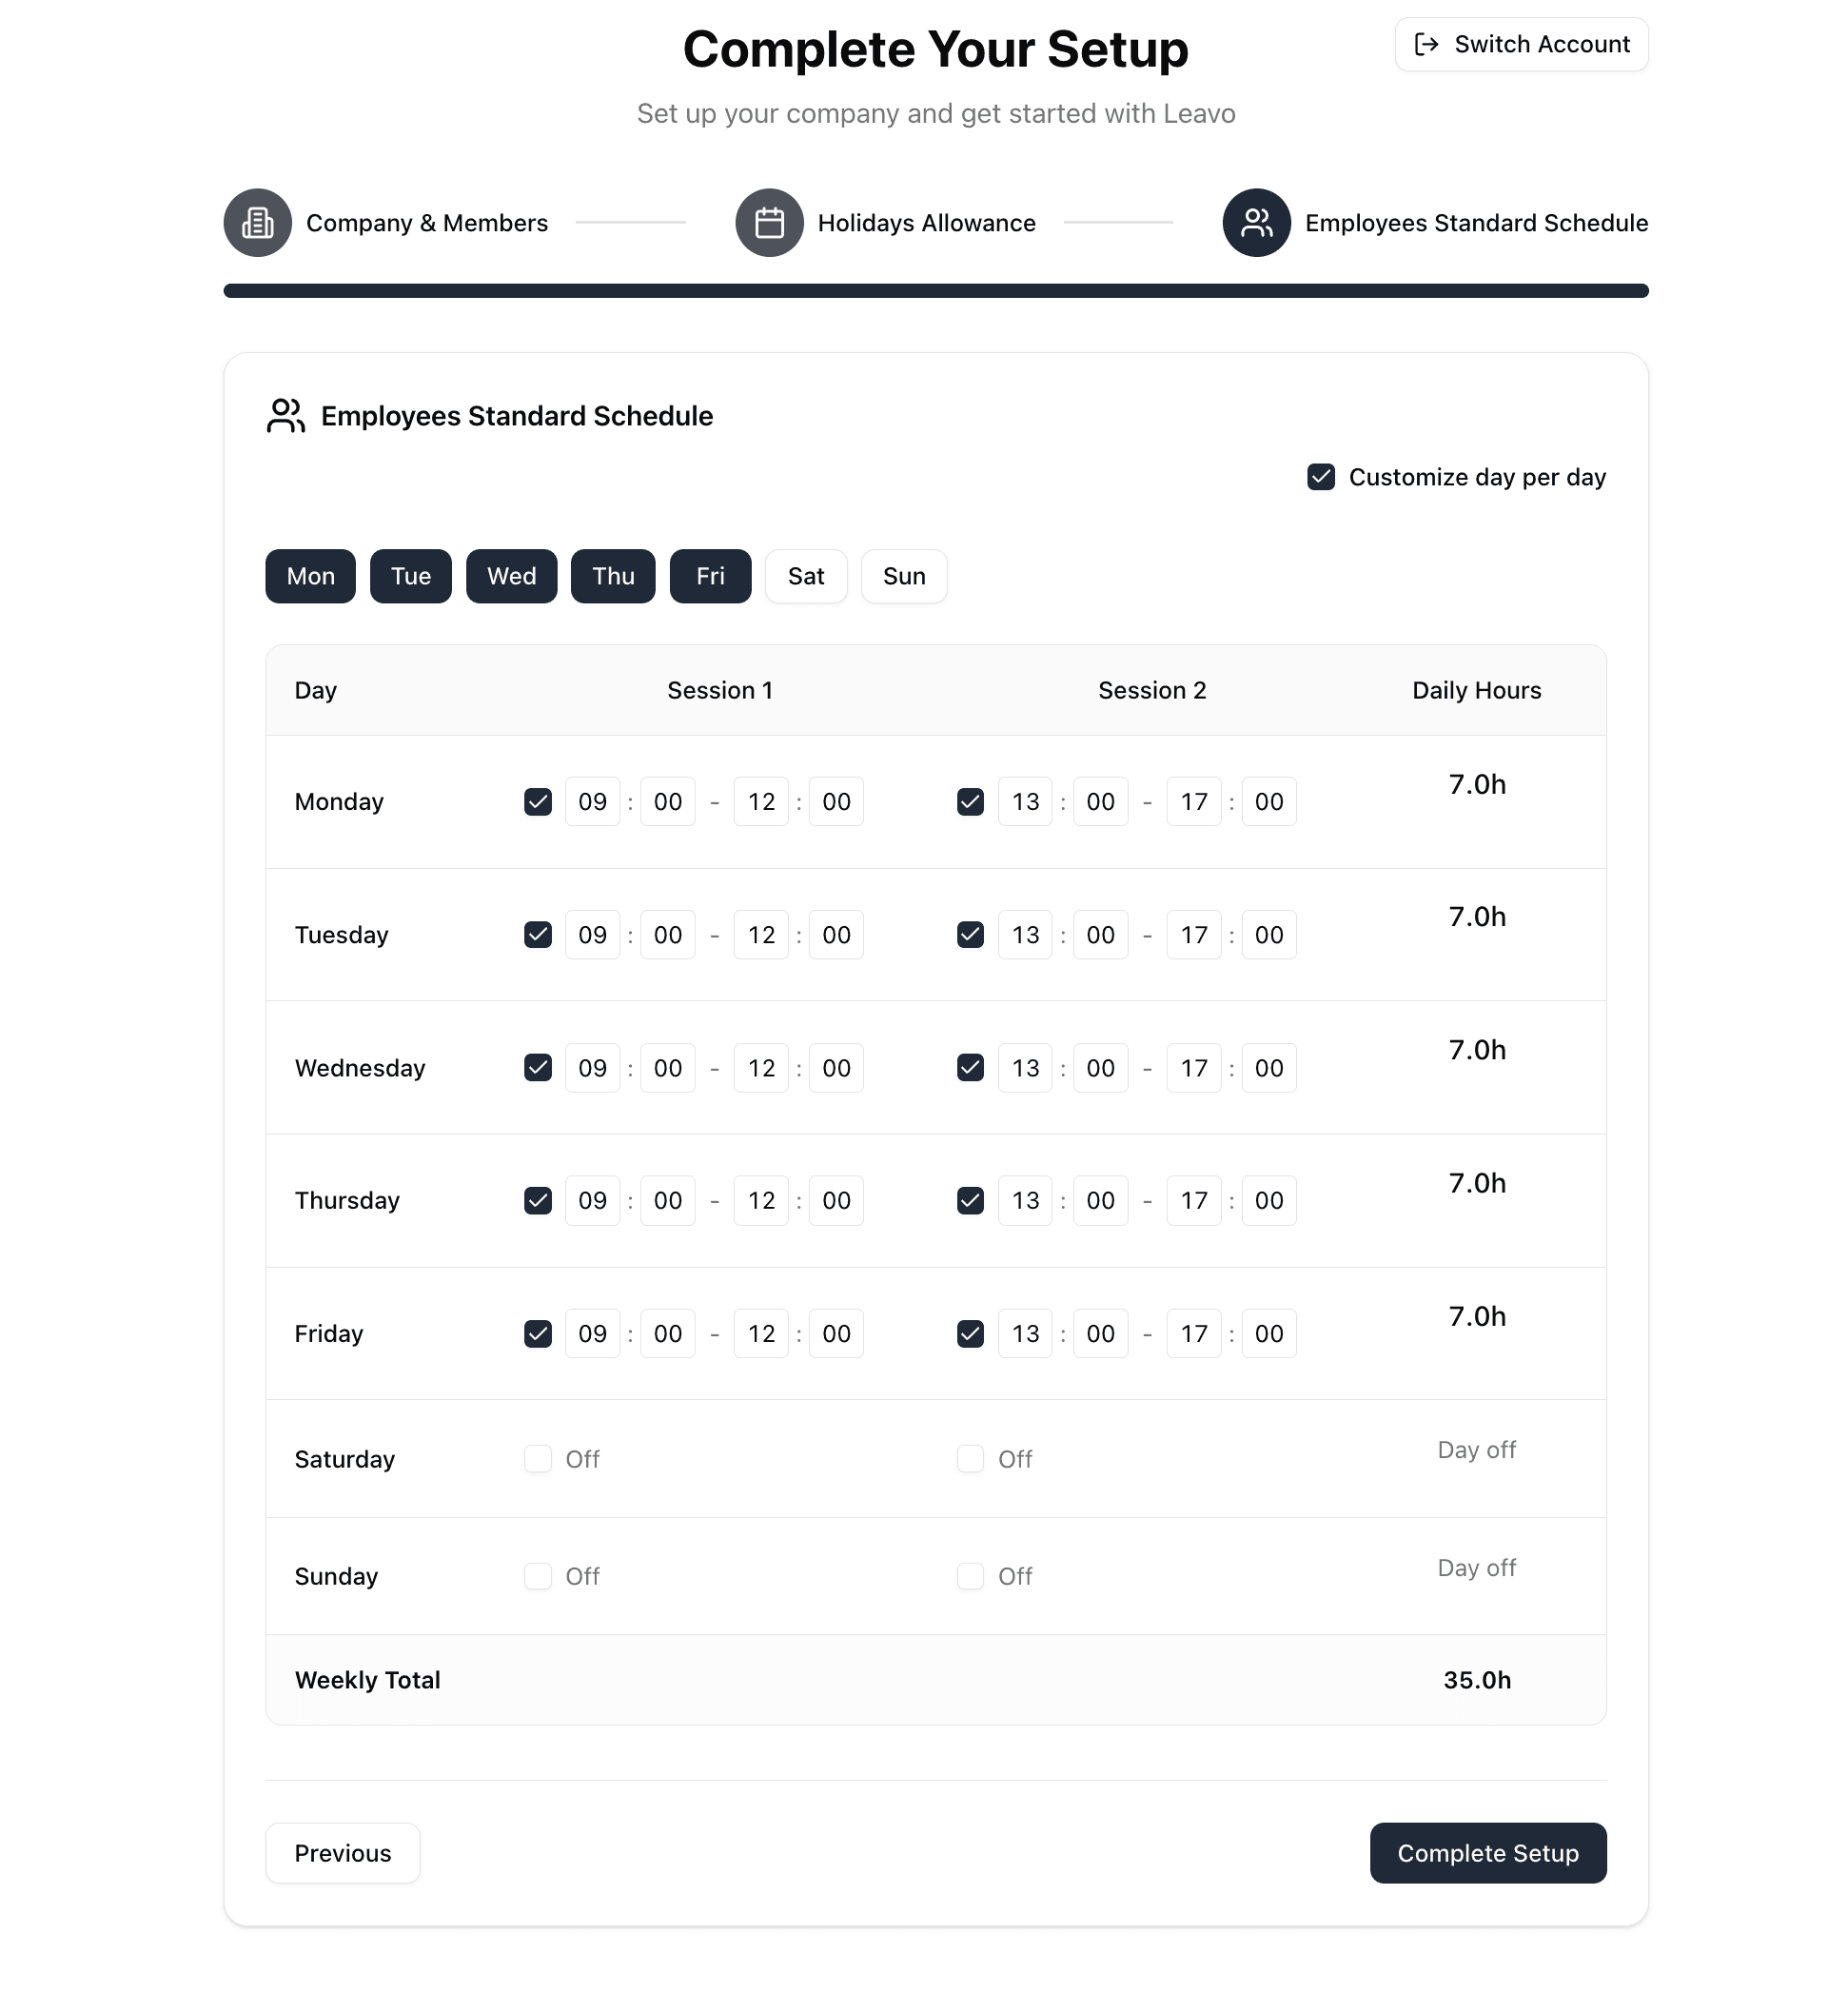
3️⃣ Step 3: Employees Standard Schedule
Define your team’s standard working hours to ensure accurate leave and balance calculations.
This schedule determines how working days, hours, and absences are calculated across all employees.
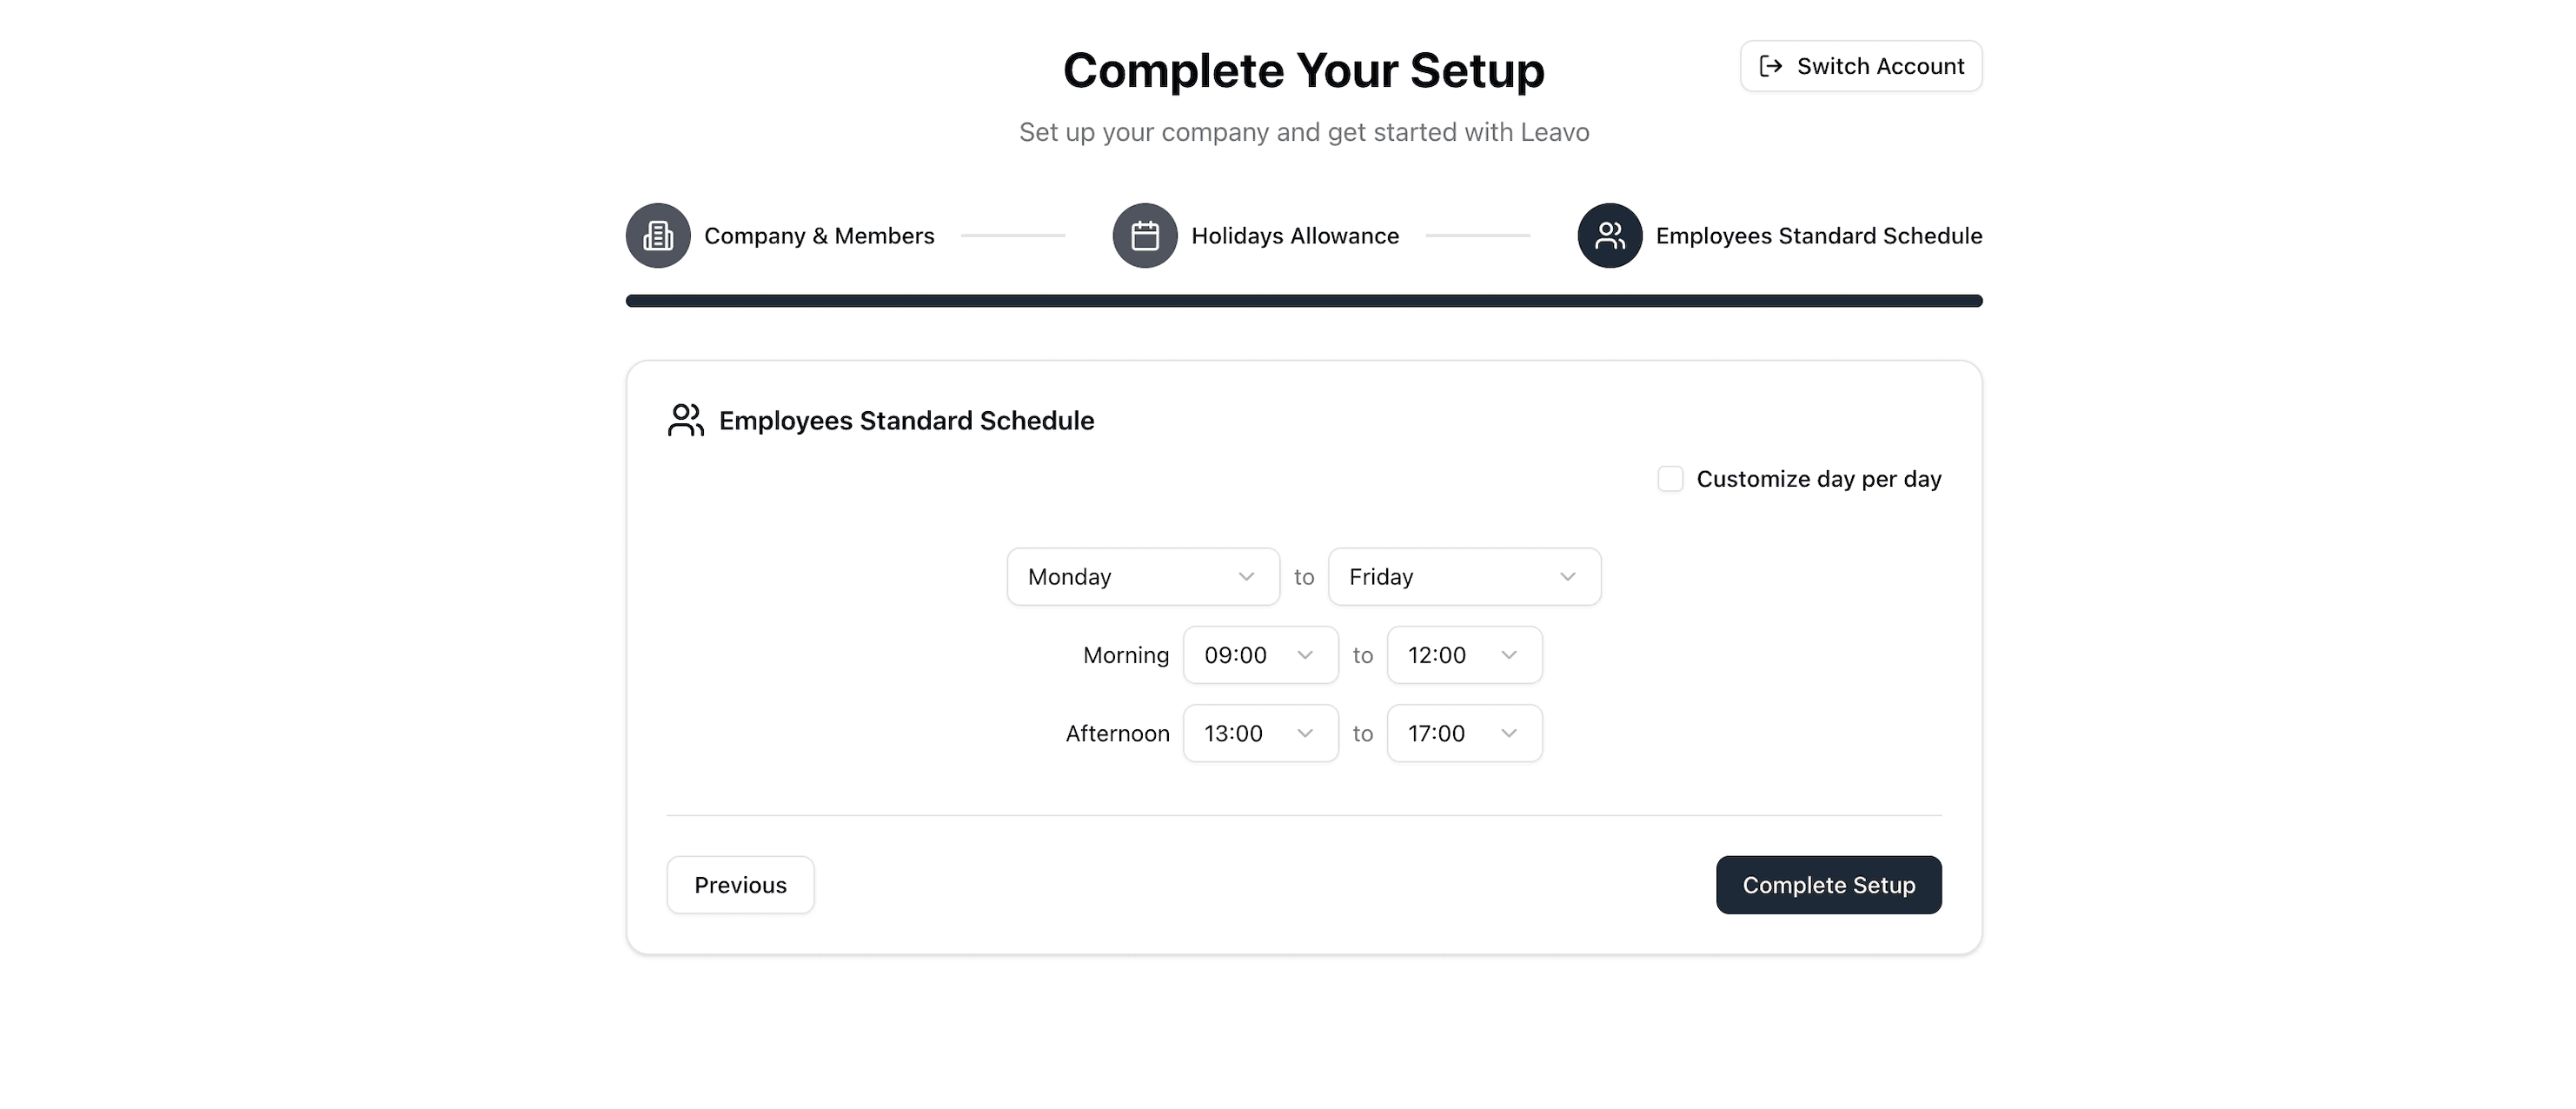
Fields Overview
| Field | Description |
|---|---|
| Days | Select the working days (Monday to Friday). Non-selected days (Saturday/Sunday) are considered days off. |
| Morning / Afternoon Sessions | Define working hours for each session for example, 09:00–12:00 and 13:00–17:00. Each day can have up to two sessions. |
| Customize Day per Day | Enable this toggle to set different schedules per day. Ideal for part-time employees, alternating shifts, or departments with unique work patterns. Once activated, you can individually adjust hours for each weekday. |
| Daily Hours | Automatically calculates total hours worked per day based on the sessions you’ve defined. |
| Weekly Total | Displays the total weekly working hours updated in real time as you modify sessions. |
How It Works
- Check or uncheck weekdays to define your working days.
- Set start and end times for Session 1 (morning) and Session 2 (afternoon).
- Toggle Customize day per day to unlock per-day adjustments (shorter Fridays).
- Review the Daily Hours and Weekly Total at the bottom for consistency.
- Once finalized, click Complete Setup to save and apply the schedule company-wide.
You can later create advanced or team-specific schedules under
administration → Schedules, where you can assign unique working hours per team or employee.
Make sure your total weekly hours reflect your organization’s policies (35h or 40h weeks).
These values directly impact leave accruals and absence tracking.
Complete Setup
When all three steps are complete, click Complete Setup.
You’ll be redirected to your Dashboard, where you can access your calendar, requests, and company administration sections.
You can revisit or edit any setup information later from the Administration sidebar.
Next Steps
Once onboarding is complete, explore the following pages to continue:
- Calendar — View your team’s leaves and availability
- Requests — Submit and approve time-off requests
- Leave Policies — Customize allowances and rules
- Members — Manage users and roles