The Calendar in Leavo provides a centralized view of all approved, pending, and upcoming leaves across your organization.
It helps managers visualize team availability, prevent overlapping absences, and ensure smooth scheduling.
From the Calendar page, you can:
- View all team leaves for the current month, week, or day
- Filter by Teams or Members
- Track approve and pending requests
- Identify overlapping absences or under-staffed days
- Access leave details directly from the calendar view
The Calendar view automatically adapts based on each user’s role and permissions:
- Employees see only their own leaves
- Team Approvers / Managers see leaves within their assigned teams
- HR and Admins have full visibility across all teams and employees
This ensures that every user sees the information relevant to their responsibilities nothing more, nothing less.
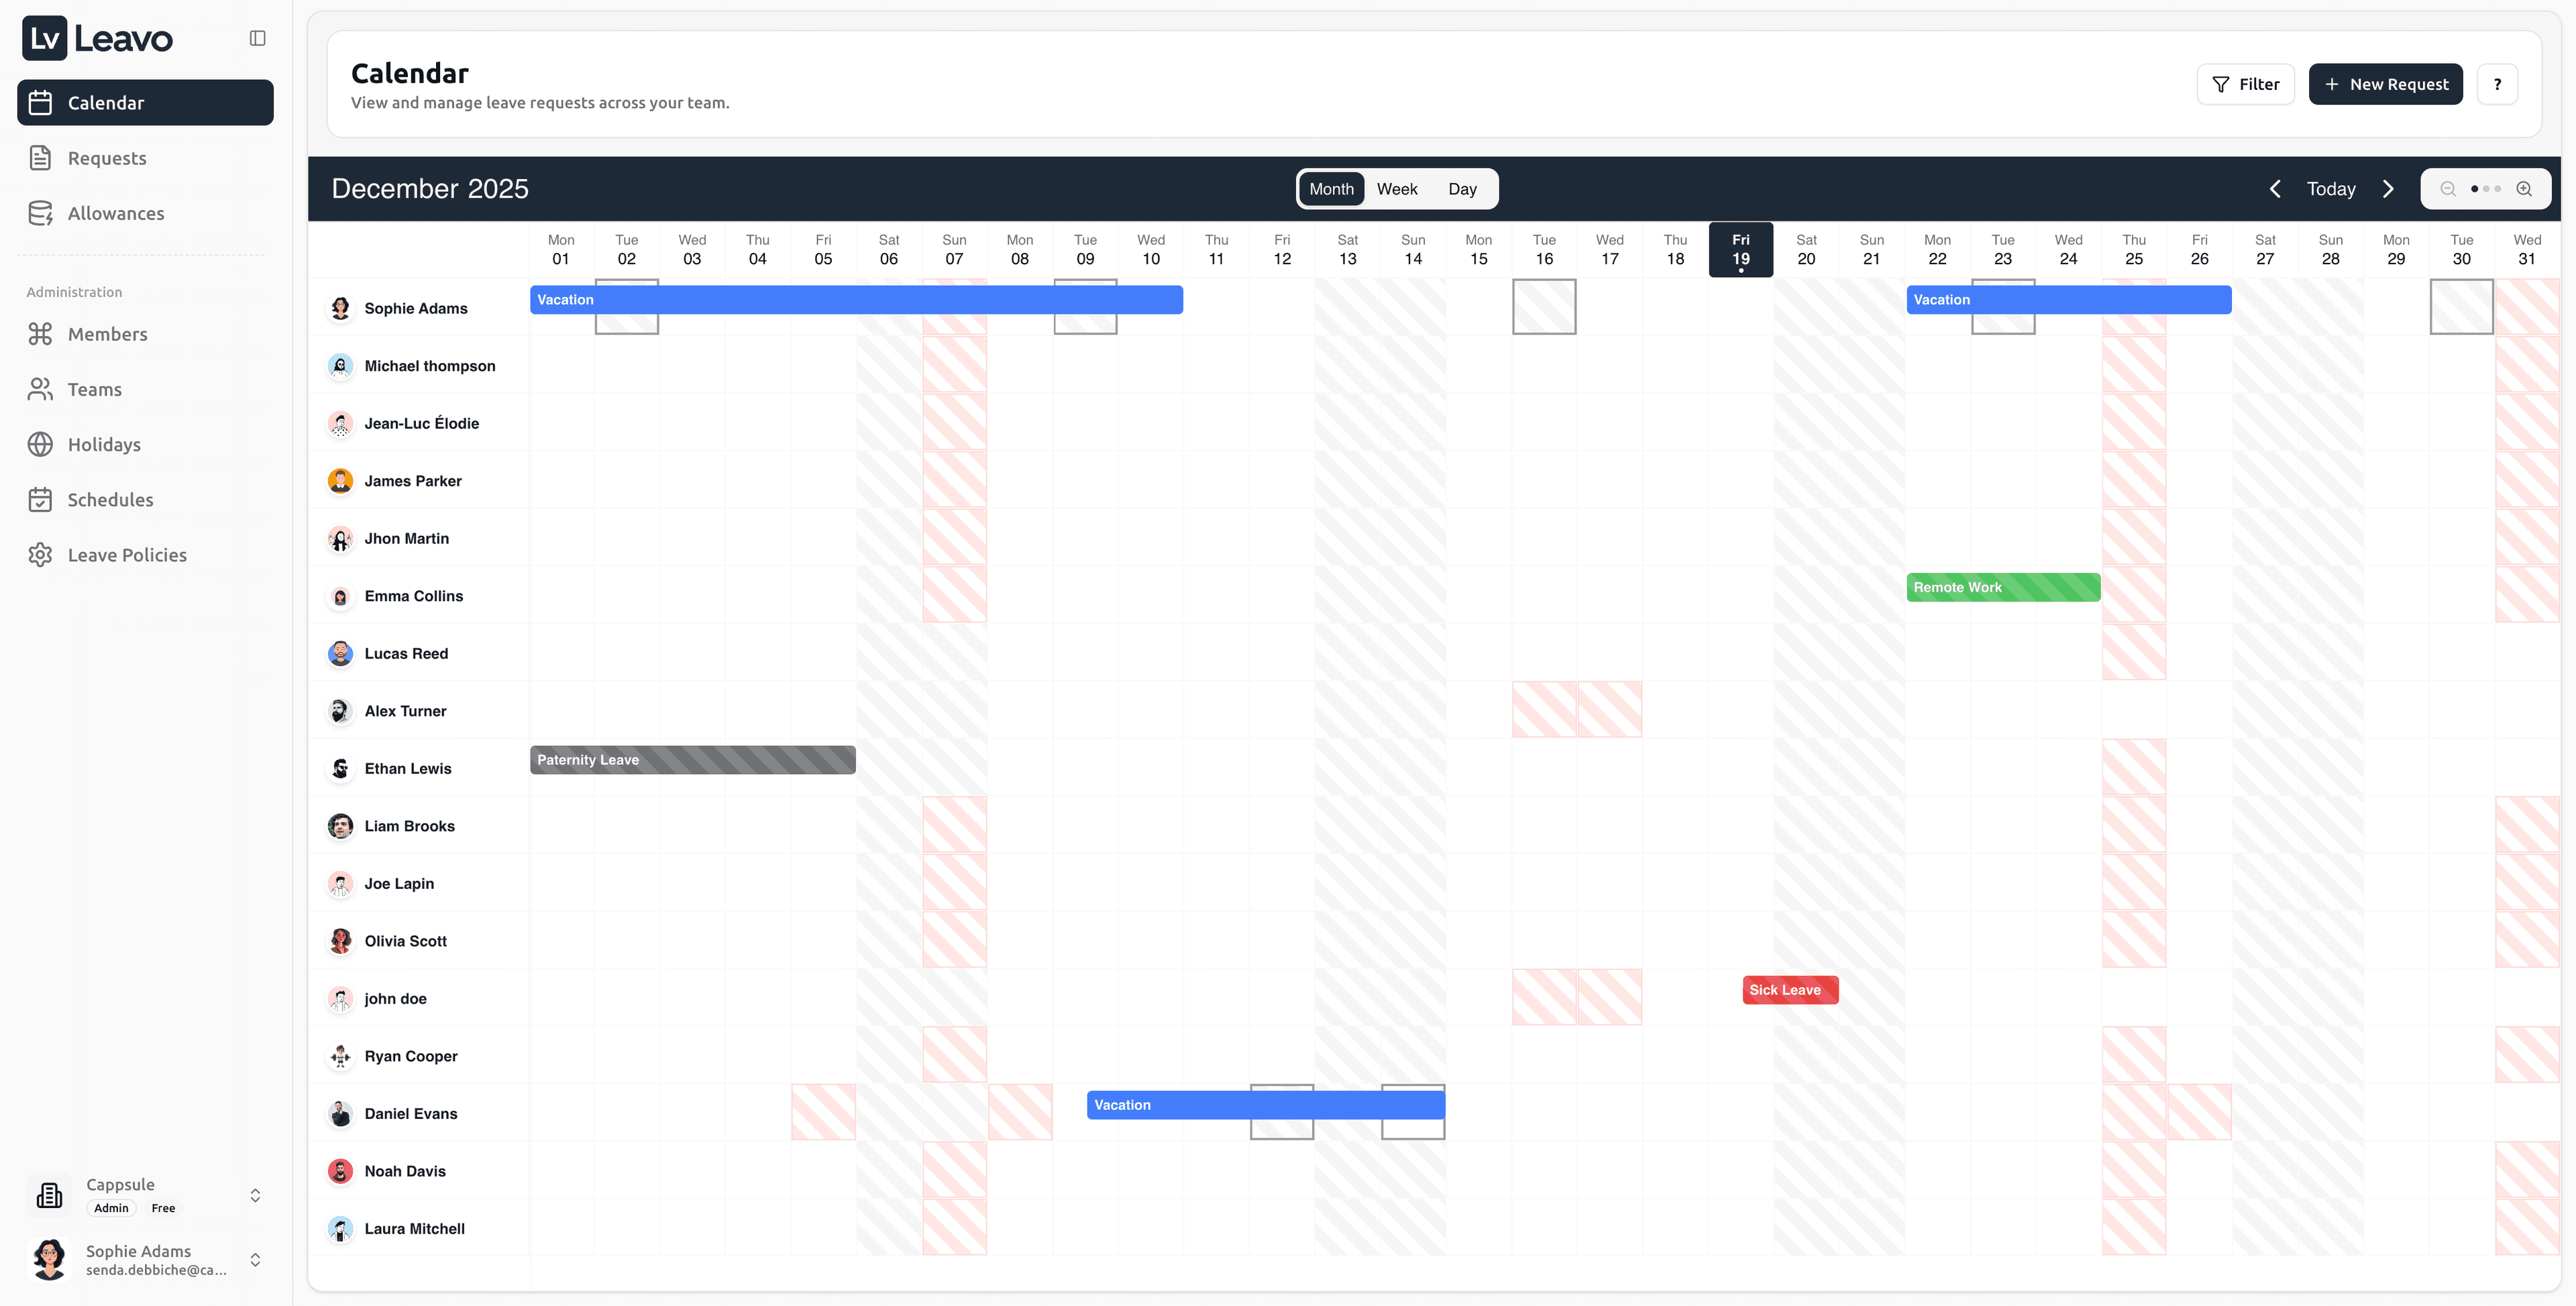
Calendar Layout
| Section | Description |
|---|---|
| Filter Bar | At the top, use the Teams and Members dropdowns to refine what’s displayed. |
| Date Navigation | Use the arrows ( ) or the Today button to navigate between dates. |
| View Switcher | Toggle between Month, Week, or Day view to adjust your display. |
| Leave Blocks | Approved or pending requests are displayed as color-coded bars along the date grid. |
| Sidebar | Navigate to Requests, Allowances, or other administration pages from the left menu. |
Filtering the Calendar
The filters make it easy to visualize only what matters to you.
Filter by Team
- Click the dropdown labeled Select teams to filter…
- Choose one or multiple teams (Marketing, Engineering).
- The calendar updates instantly to show only those teams’ members.
Filter by Member
- Use the Select members to filter… dropdown.
- Select one or several employees.
- Combine with team filters for precise visibility.
You can clear all filters anytime by clicking outside the dropdowns or pressing Esc.
Changing Views
You can switch between Month, Week, and Day views for different levels of detail:
| View | Best For | Description |
|---|---|---|
| Month | Overview | See all team absences for the entire month at once. |
| Week | Planning | Ideal for weekly scheduling and checking overlaps. |
| Day | Detail | Focus on daily attendance and who’s currently on leave. |
Use the Week number headers (Week 44, 45, etc.) to plan around company-wide projects or deadlines.
Viewing Leave Requests
Click on any leave entry in the calendar to open its details.
You’ll see:
- Employee name and avatar
- Leave type (Annual Leave, Sick Leave)
- Status (Approved, Pending, or Rejected)
- Start and end dates
- Duration (full or half days)
- Notes added by the requester

Managers can also approve or reject requests directly from this modal.
Depending on your role and the request status, you can also edit an existing leave request directly from this detail view.
- Employees can edit or cancel their own requests as long as they are not approved.
- Admins, HR and Approvers can edit requests on behalf of employees, even after approval, to adjust dates, leave type, or descriptions (according to company rules).
When a request is edited, the Request Summary and leave balance are recalculated in real time, and all related views (Calendar, Requests table, Allowances) are updated automatically.
Creating a New Leave Request
Click the New Request button in the top-right corner to open the form panel.
This form allows admins or employees to submit new leave requests directly from the calendar.
| Field | Description |
|---|---|
| Select Member | The employee requesting leave (auto-selected for employees) |
| Leave Type | Choose the applicable type (Vacation, Sick Leave, etc.) |
| Date Range | Select start and end dates using the calendar picker |
| Description | Optional comment for managers or HR |
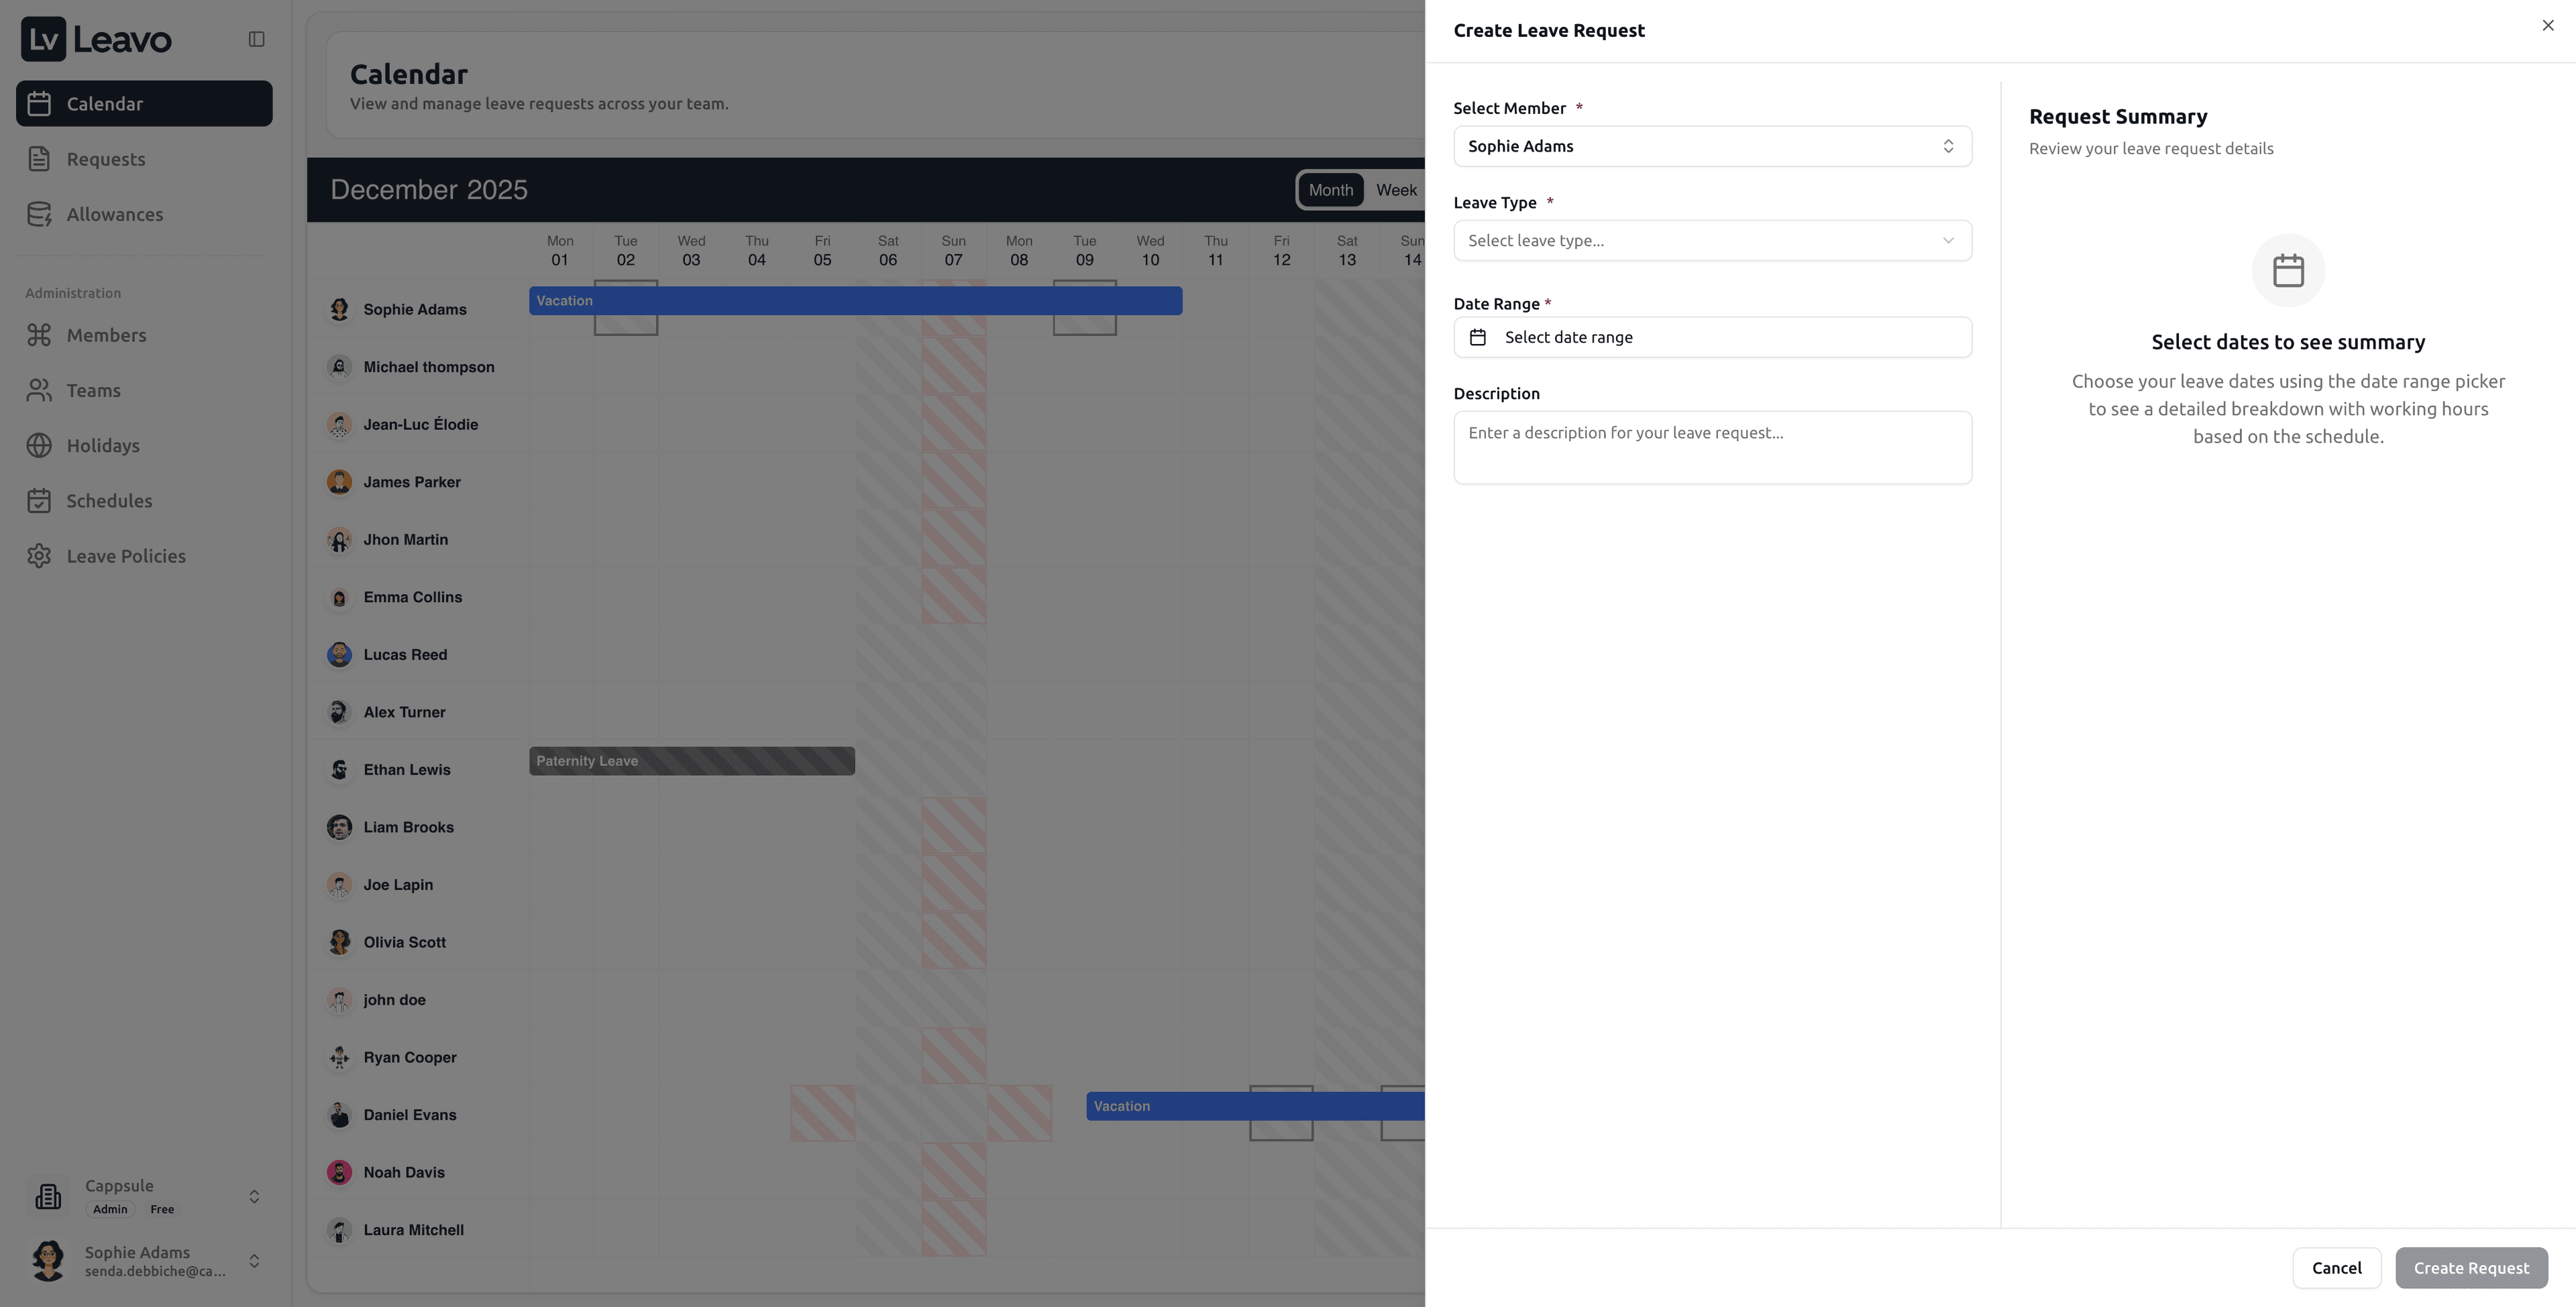
The Request Summary on the right updates automatically as you choose dates and shows:
- Total leave days
- Adjustments based on schedule
- Working vs. non-working days
Buttons:
- Cancel → close without saving
- Create Request → submit the request for approval
You can also create a leave request straight from your calendar view.
Once submitted, the request appears instantly on the calendar as Pending until approved.
Color Legend
Use the Color Legend button ( icon in the top-right corner) to understand how each color represents leave status or day type.
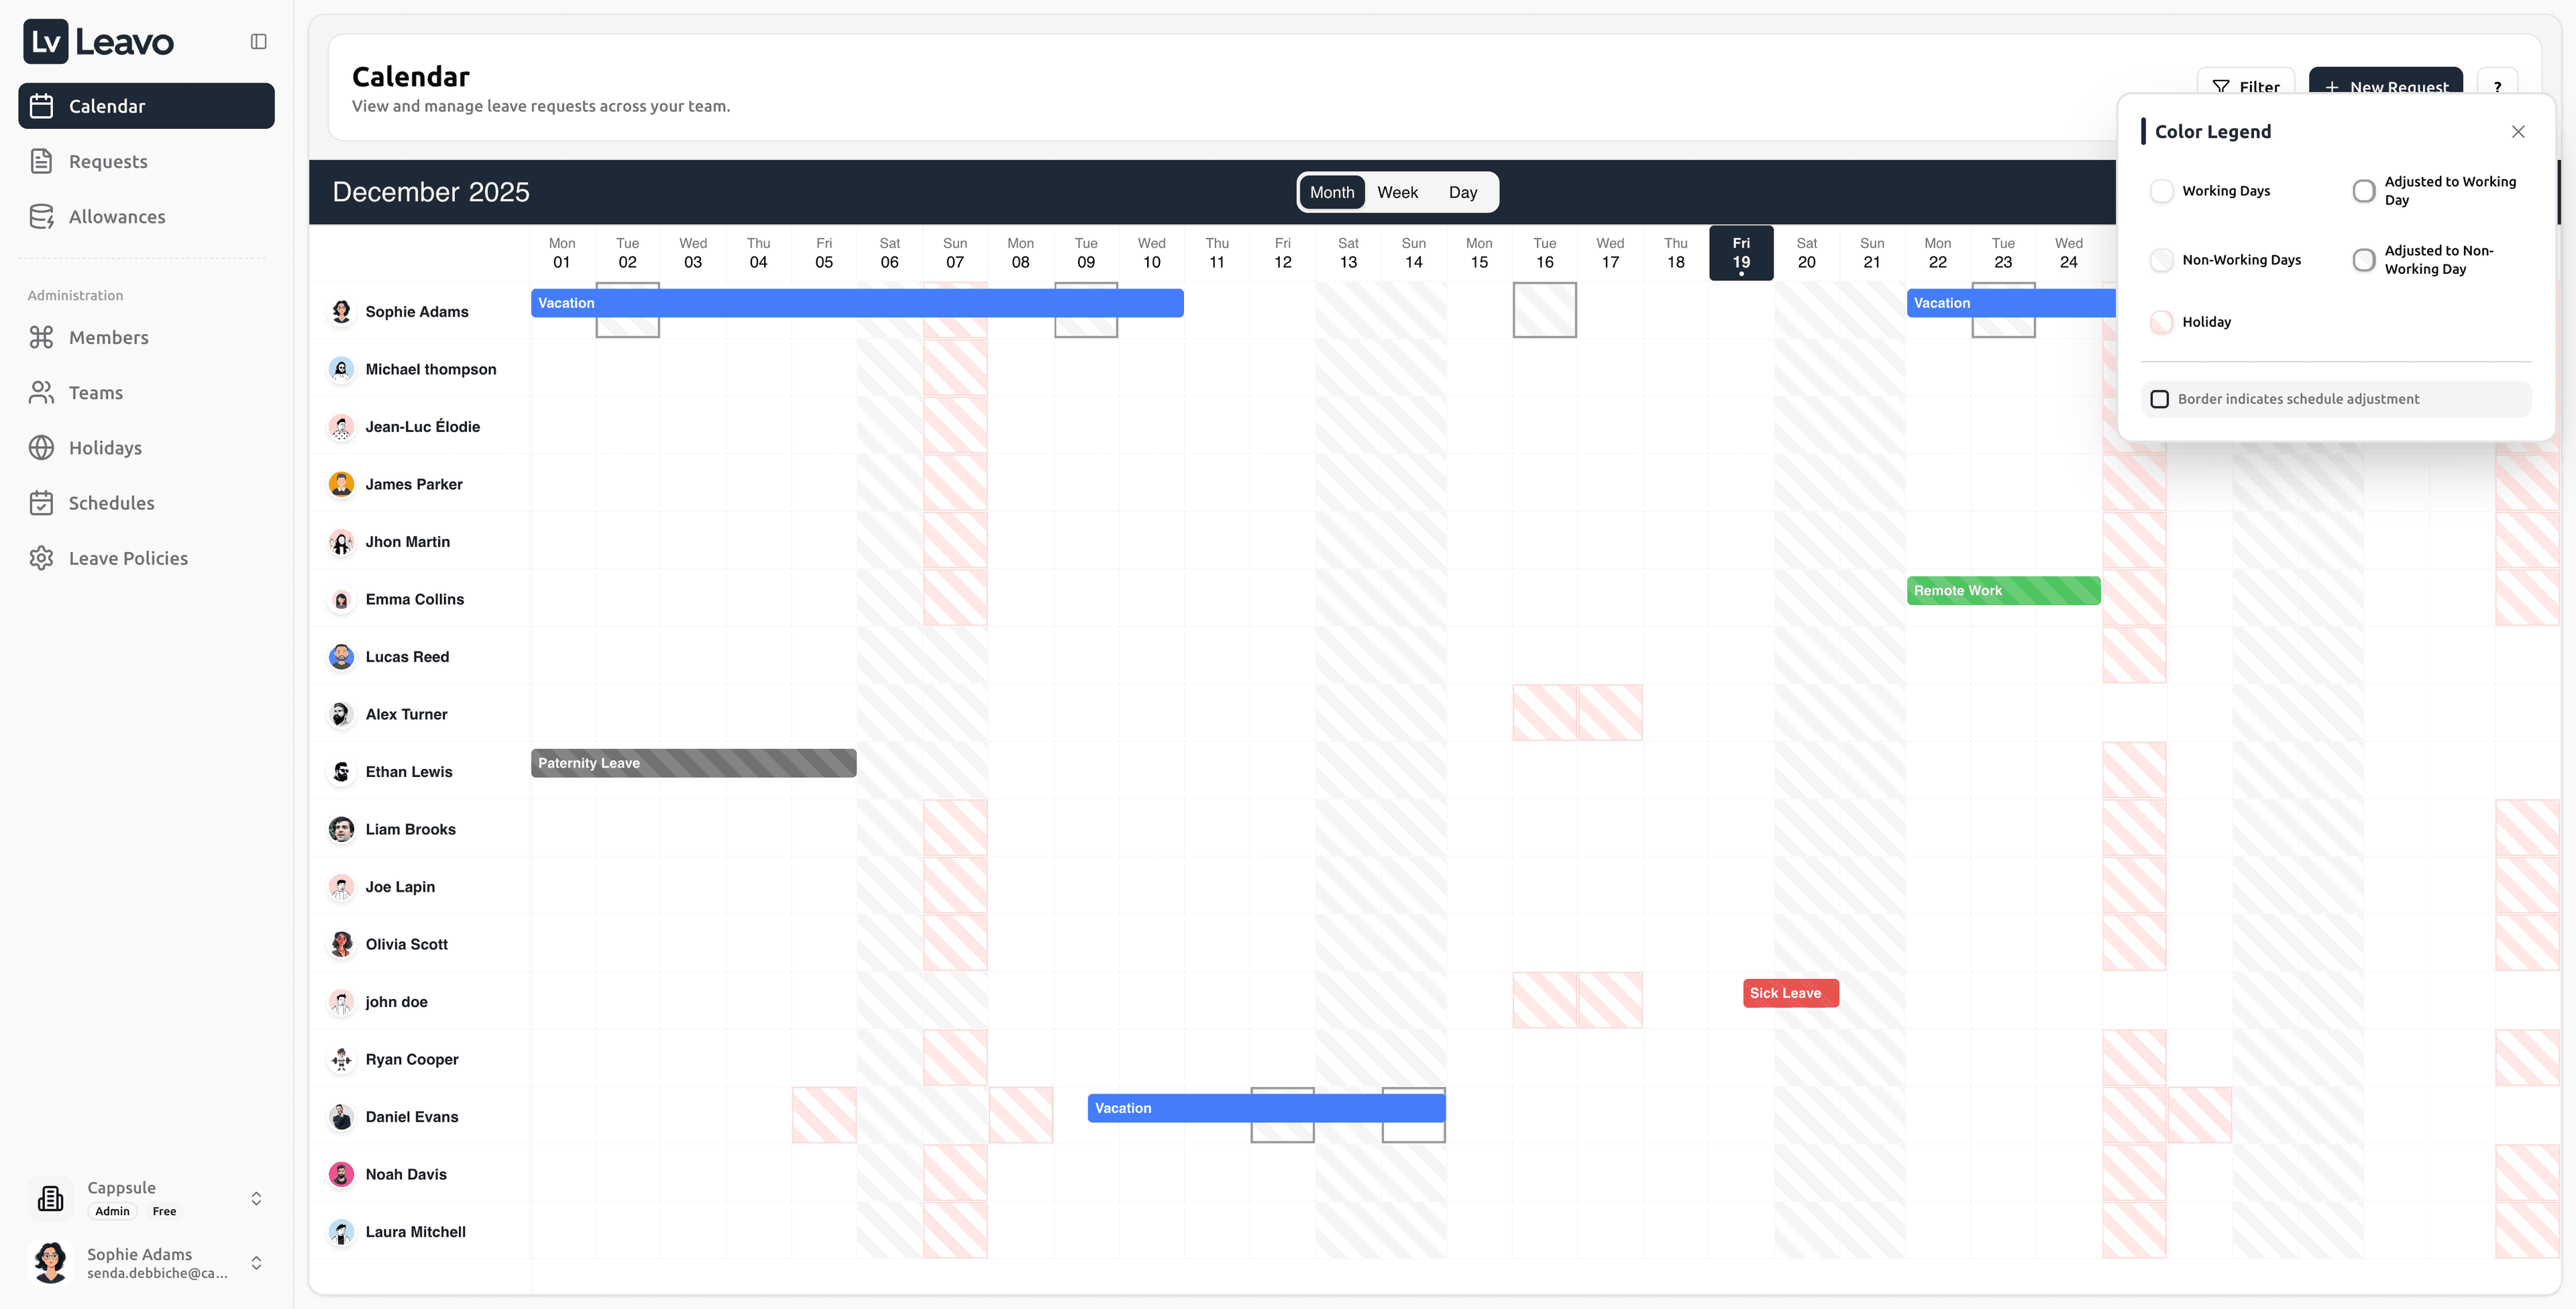
| Color | Meaning |
|---|---|
| Working Day | Standard working day |
| Non-Working Day | Weekends or rest days |
| Holiday | Public or regional holiday |
| Grey (Outlined) | Schedule adjustment day |
Borders around a block indicate a schedule adjustment (partial or shifted working day).
Navigation Shortcuts
| Action | Shortcut |
|---|---|
| Go to today’s date | Click Today in the top-right corner |
| Move to next/previous month or week | Use the arrows |
| Switch between views | Click Month, Week, or Day |
| Filter results | Use the Teams/Members dropdowns |
Best Practices
- Managers should review the calendar weekly to anticipate coverage gaps.
- Employees can use it to check colleagues’ availability before submitting a new request.
- Admins can identify trends in absences and adjust policies accordingly.
Troubleshooting
| Issue | Solution |
|---|---|
| Calendar looks empty | Clear filters or verify that leaves have been approved. |
| Some members don’t appear | Check that they belong to a visible team or have active status. |
| Requests missing from view | Ensure correct view (Month/Week/Day) and no filters hiding results. |
| Incorrect dates | Verify your company’s timezone and calendar year start in Settings. |
If your calendar still doesn’t display expected data, refresh the page or contact your workspace administrator.
Once your filters and view are set, the calendar becomes a powerful visual tool to manage your team’s availability.
From here, you can jump directly to:
- Requests — Submit or approve time-off
- Allowances — Review balances
- Schedules — Adjust working hours